Have you ever wanted to start baking sourdough bread but felt overwhelmed by all the advice, rules, and complicated techniques? I’ve been there too! When I first started, I thought sourdough was intimidating—but I’ve learned that it doesn’t have to be. You don’t have to follow every rule perfectly to get delicious homemade bread.
Jump to Recipe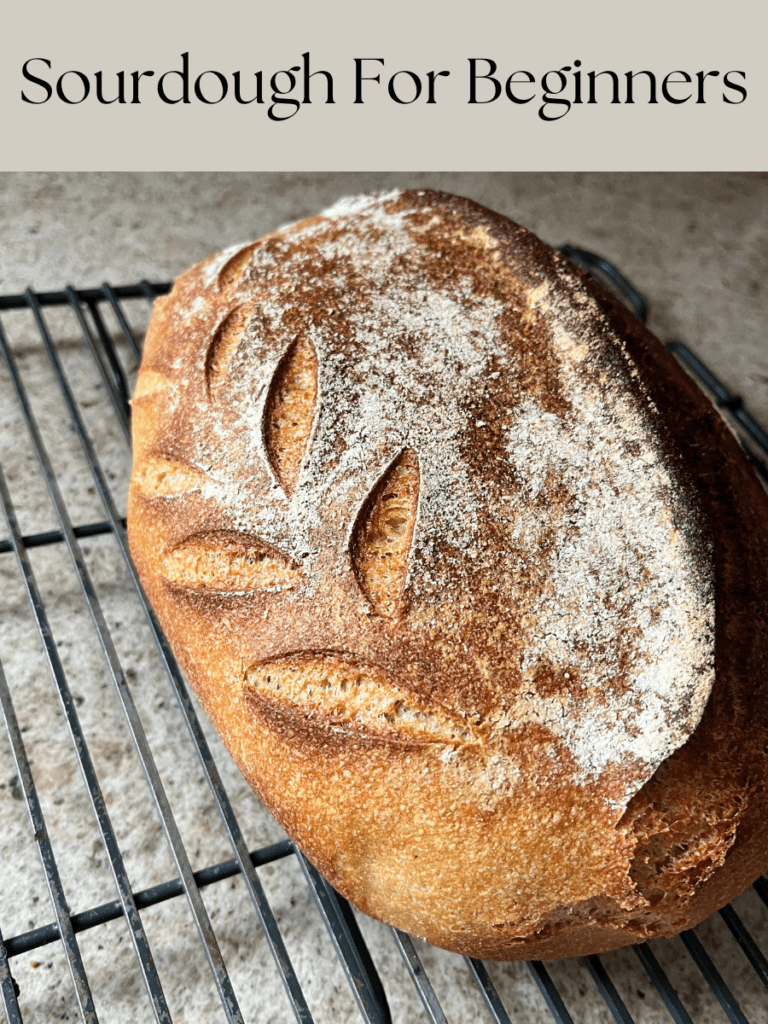
In this post, I’ll walk you through my simple sourdough process, breaking it down step by step so you can feel confident in getting started.
This post is all about sourdough for beginners.
This post contains affiliate links. When I suggest products, and you purchase something using my link, I will receive a commission at no extra cost to you.
What is sourdough?
At its core, sourdough is just flour, water, and time. You create a natural starter (a mix of flour and water that collects wild yeast), and that starter helps your bread rise—no commercial yeast needed.
It’s slower than baking with store-bought yeast… but way more flexible. If something comes up (which, let’s be real, it always does), you can pause, refrigerate, and come back to your dough when you’re ready.
Why I Started Baking Sourdough
My husband originally got a sourdough starter from my mom as a Christmas gift, but with his busy schedule, he didn’t have time to bake. I had always loved sourdough, especially growing up near Seattle, so I decided to give it a try.
I also kept hearing about the health benefits of sourdough, and that motivated me even more. Now, after months of experimenting, I’ve found a method that works for our family, and I want to share it with you!
What do I need to start?
You don’t need a bunch of fancy tools—but a few things do help.
Here’s what I actually use:
Grain mill (for fresh milled wheat)
KitchenAid mixer (for kneading!)
My sourdough rhythm (what I do now)
This is what sourdough looks like in my house—with kids around, homeschool happening, and no rigid schedule. I use my basic recipe below and adapt it with my fresh milled flour.
➤ The night before I bake:
- I take my starter out of the fridge.
- I feed it with fresh milled flour and water until it looks like thick pancake batter.
- I leave it on the counter overnight.
If it’s sluggish in the morning, I discard half and feed it again. (I usually use the discard in pancakes or banana bread.)
➤ Mixing the dough:
- I mix bubbly starter, water, and salt with my Danish dough whisk.
- I add freshly milled flour—usually a mix of hard white wheat and Kamut.
- I stir until combined, knead it by hand a little, and let it rest for 30 minutes.
Then I knead it in my KitchenAid mixer for about 20–25 minutes, until it’s smooth and not sticky.
➤ Bulk ferment (first rise):
- I place the dough in an oiled bowl, cover it, and let it rise on the counter.
- Sometimes this takes all day, sometimes overnight—it depends on the temperature in my house.
- When it’s doubled in size and feels airy, it’s ready to shape.
➤ Shaping and second rise:
- I knead the dough gently on the counter and shape it into a round loaf.
- I flour my banneton and place the dough in, top side down.
- I place the basket inside a plastic grocery bag, tie it shut, and put it in the fridge.
It stays in the fridge until I’m ready to bake—usually 12–24 hours, but sometimes 3–4 days.
➤ Baking:
- I preheat the oven to 475°F with my Dutch oven inside.
- I turn the cold dough out onto parchment paper.
- I place it into the hot Dutch oven, cover it, and bake for 20 minutes with the lid on.
- Then I remove the lid and bake for another 20 minutes.
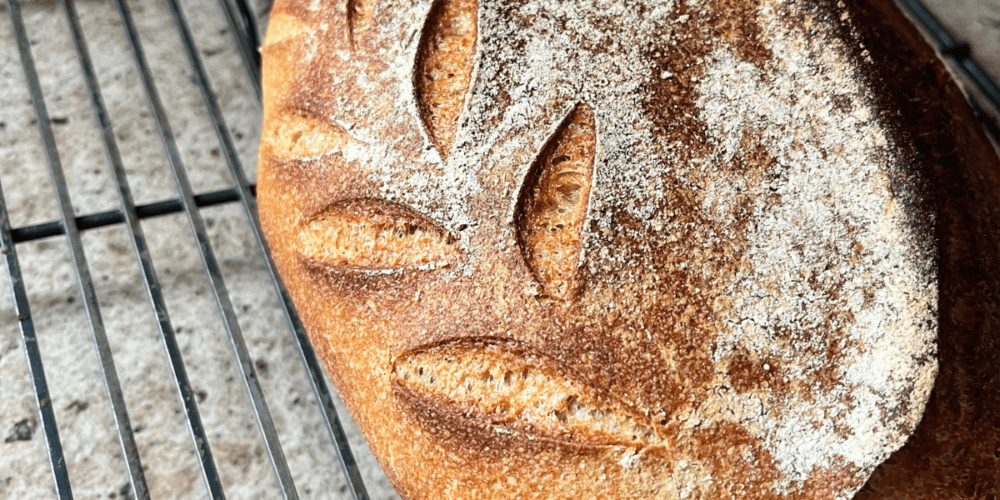
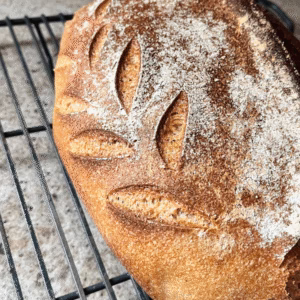
Let it cool on a rack if you have the willpower… we usually slice it warm!
What if it flops?
Honestly? Sometimes mine still does. And that’s okay.
It might not rise like you want, or it might look wonky coming out of the oven—but it’s still homemade, nourishing, and made by you. And every time you try, you learn something new.
The one thing I want you to know:
You don’t have to bake every week. You don’t have to have a perfect routine.
You can start small. Pause when life gets crazy. Pick it back up again later.
This doesn’t have to be one more thing on your plate—it can be something that fills your home with comfort and goodness.
Taking Care of Your Sourdough Starter
After removing the amount of starter I need for baking, I simply add fresh flour and water back into my starter jar and mix it to a pancake batter-like consistency. I leave it out on the counter for about 8–12 hours, then put it back in the fridge until next time.
Some weeks, I bake multiple loaves; other times, I go weeks without using it, and my starter still stays strong!
Final Thoughts
Sourdough doesn’t have to be complicated. If you’ve been hesitant to start, I hope this guide shows you that you can keep things simple and still get delicious results.
Let me know if you have any questions, and happy baking!
This post was all about sourdough for beginners.
Want a simple checklist to get started?
I created a Simple Sourdough Start Checklist just for moms like us—no fluff, no fuss. Just the steps you need to feel confident trying sourdough in your own kitchen.
👉 Download the checklist below!
You’ve got this, friend.
— Dana
Basic Sourdough Artisan Loaf
Equipment
- 1 Food Scale
- 1 Mixing Bowl
- 1 Electric Mixer (Kitchenaid)
- 1 Banneton Basket
- 1 Dutch Oven or Baking Stone
Ingredients
- 500 grams Freshly Ground Flour You could sub all purpose or bread flour 1 for 1
- 100 grams Sourdough Starter I use mine straight from the fridge
- 375 grams Water
- 10 grams Salt
Instructions
Feed your starter the night before you plan to bake.
- Use fresh milled flour and water. Stir until it’s the consistency of thick pancake batter.
- Leave it loosely covered on the counter overnight.
Check your starter in the morning.
- If bubbly and risen, it’s ready to use.
- If not, discard half and feed again. Let it sit until active.
Mix the dough.
- In a large bowl, combine starter, filtered water, and salt. Stir until dissolved.
- Add fresh milled flour (usually a mix of hard white wheat and Kamut).
- Mix with a Danish dough whisk, then knead briefly by hand until the dough comes together.
Let the dough rest (autolyze) for about 30 minutes, covered.
Knead the dough.
- Transfer to a stand mixer and knead with the dough hook for 20–25 minutes, until smooth and soft (not sticky).
- Alternatively, knead by hand until the dough passes the windowpane test.
Bulk ferment the dough.
- Place the dough in a lightly oiled bowl, cover, and let it rise on the counter until doubled in size (this can take 8–12+ hours depending on your home’s temperature).
Shape the dough.
- Turn the dough out onto a lightly floured surface.
- Shape into a round loaf by gently kneading and pulling the dough toward you to create tension on the top.
Prepare for cold proof.
- Place the shaped dough top-side down into a floured banneton basket.
- Put the basket inside a plastic grocery bag or wrap loosely with a towel.
- Refrigerate for at least 12–24 hours (or up to 4–5 days).
Bake the bread.
- Preheat the oven to 475°F with a Dutch oven inside.
- When fully preheated, remove the dough from the fridge and gently turn it out onto parchment paper.
- Place the dough (on parchment) into the hot Dutch oven.
- Cover with the lid and bake for 20 minutes.
- Remove the lid and bake another 20 minutes until golden brown.
Cool the loaf on a wire rack.
- Let cool completely for best slicing… or dig in while it’s warm (no judgment!).
Notes
- If your kitchen is cold, bulk fermentation may take longer—watch for dough doubling and bubbles.
- If using a baking stone, add a tray of hot water to create steam.
- For a lighter crust, tent the bread with foil after removing the lid.

[…] post is all about how to start sourdough as a […]